 LinkedIn has an interview prep feature. Is it worth using? My answer is a qualified “yes.” Here is my review and some tips for making the most of this feature.
Where to Find the Interview Prep Feature
Access it from the Jobs tab. Click “More” and select “Interview Prep” from the dropdown options.
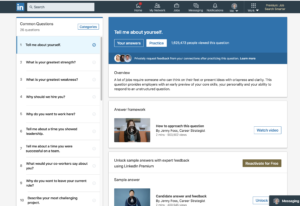
You’ll then arrive at this page (see below), where you can access generic advice and practice answering questions.
Here are my thoughts about both aspects of the site.
Generic Advice for Answering Interview Questions
I watched the video on how to answer “Tell me about yourself,” which I call the “first impression interview question.” If (and this is a big “if”) you had only two minutes to obtain guidance on how to prepare this crucial answer, this video would be a good introduction. It emphasizes the “SHE” formula: your answer must be Succinct, Honest and Engaging. That’s a good start.
What’s missing is this: How can you answer this question in a way that really makes you stand out as the best person to hire? That’s a matter of knowing and communicating your key selling points, a.k.a. your unique selling proposition.
It really takes far more than two minutes to prepare a winning answer to “Tell me about yourself.” With one-on-one interview coaching clients I spend an hour on this. And of course, a live coach’s guidance will be customized to the client and the particular job(s) for which they will be interviewing.
Interview Practice with LinkedIn’s Video Recording
The app offers an easy way to practice speaking on camera and record yourself. This is good practice to help you succeed with video interviews.
You can then share the video and get feedback from any of your LinkedIn contacts. (How about sharing it with me? I will give you a few words of expert feedback for free. Of course, you’ll need to send me a connection invitation first.)
One of the most important things you can do in a video interview is to create the impression of friendly eye contact by looking at the camera, not the image on the screen. Here’s how you can do this from the very beginning of your practice recording:
After you press the red “camera” icon, the icon will change to a 3, 2, 1 and then a square “stop” symbol. Watch that series of icons a few times until you can easily tell when it’s time to start talking, even without looking directly at the icon. Then when you’re ready to record, you can be looking at the camera already when it’s time to talk, rather than being seen hastily looking up and orienting yourself.
Here’s another advanced tip, about the still image that appears before the video is played, which is called the “thumbnail.” Thumbnail images are notorious for looking bad. Your expression can easily look blank and clueless, unengaging, or just unattractive.
Here’s how to ensure that the thumbnail shows you with a nice, confident smile–not a goofy “duh” look!
- Before you press to record, assume the expression you want the viewer to see. (A smile is a good choice!) Then look at the camera, still smiling, and when it’s time, answer the question.
- Use your imagination to pretend that you’re really talking to a live person. Be just as personable as if they were with you.
- When you’re done answering, continue to hold a pleasant and confident expression as you look down to press the stop button.
Feedback from a Live Human Being
Give it a shot and share the recording with me! I’ll give you a little feedback and, if you like, I’ll answer any questions you may have about personalized, one-on-one interview coaching.


